Avocado Topiary and Pit Marking

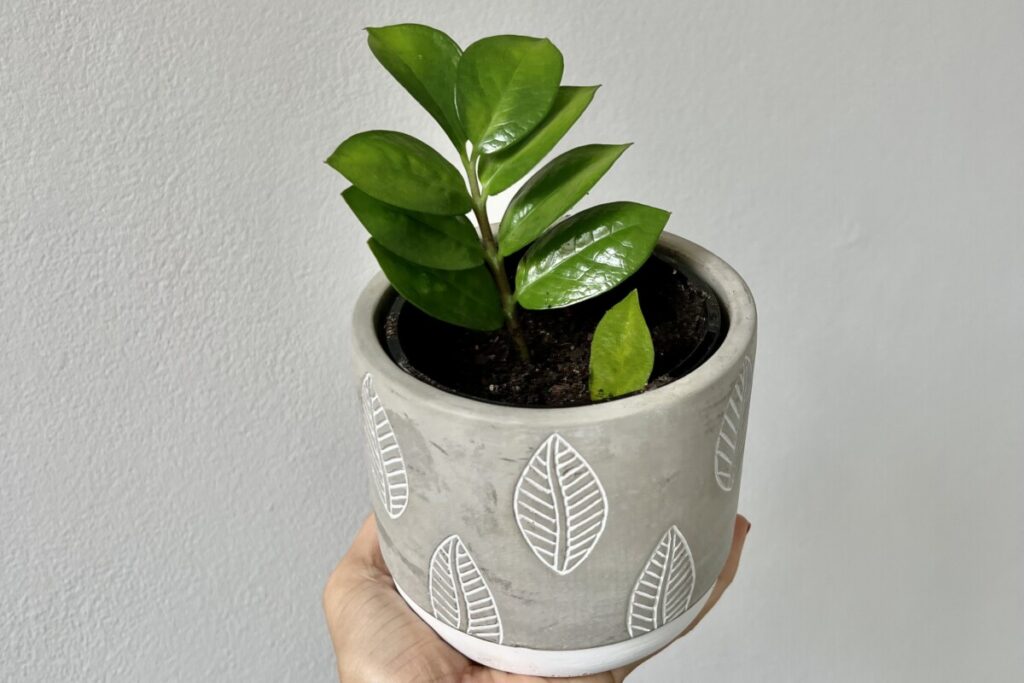
The humble ZZ plant (Zamioculcas zamiifolia) is a popular, handsome waxy plant. Also known as the Zanzibar Gem, they produce round, moisture storing rhizomes making them drought tolerant (for forgetful plant-parents!) They are also very resistant to pests and diseases. All of this, along with the fact that the ZZ Plant is a great air purifier, makes it a popular indoor plant.
The ZZ Plant is the perfect beginner-friendly plant or for those part-time plant parents as it thrives with very little care. These hardy aroids are often found in windowless offices or bathrooms without much natural light. This is because the fluorescent light is sufficient to keep it alive. The gym that I go to, for example, has ZZ’s around the gym floor as it doesn’t get much natural light. They also require very little water thanks to their moisture-storing rhizomes. Saying that, they are happier and do grow faster in bright to moderate, filtered light and watering a couple of times a month once the soil has dried out.
So – are these the perfect house plants? Almost. Care should be taken while handling the ZZ plant, as all parts of the plant are poisonous. Wearing gloves and hand washing are necessary to avoid any irritation and all ZZ plants should be kept away from inquisitive children and pets.
There are a number of ways to propagate the ZZ plant:
As I have not yet attempted the rhizome splitting or propagation in soil, this blog will focus on the methods I have used and had success with. As such, I’ll focus on stem and leaf propagation in water.
I am a big water propagation fan as I love watching the roots grow and seeing the cutting transform into it’s very out plant.
You really don’t require much for propagating a zz plant stem. The most important things are:
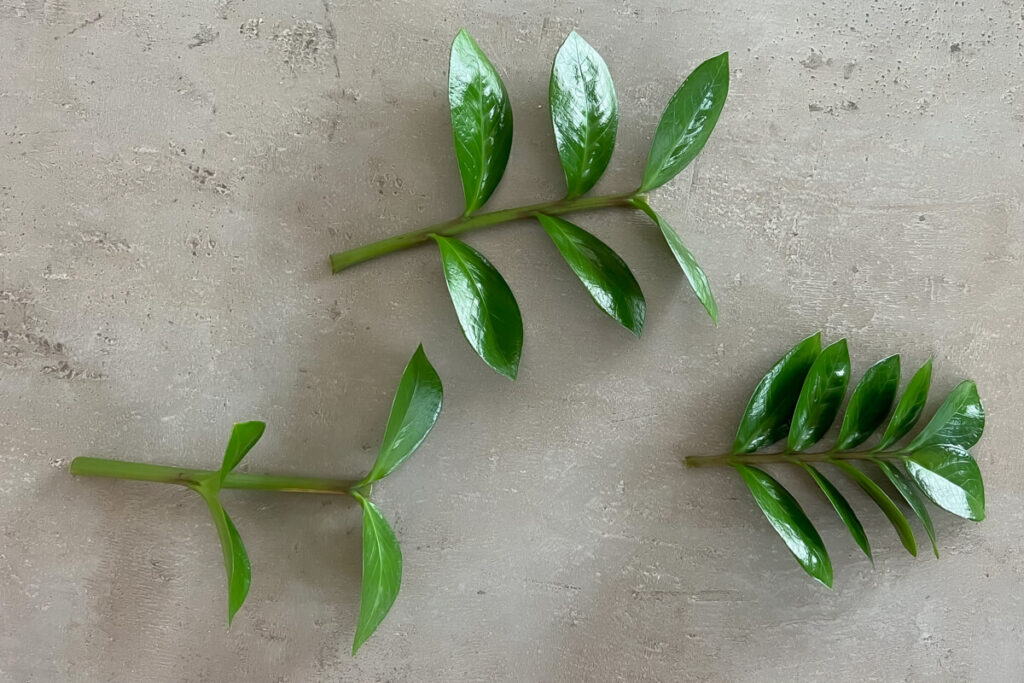
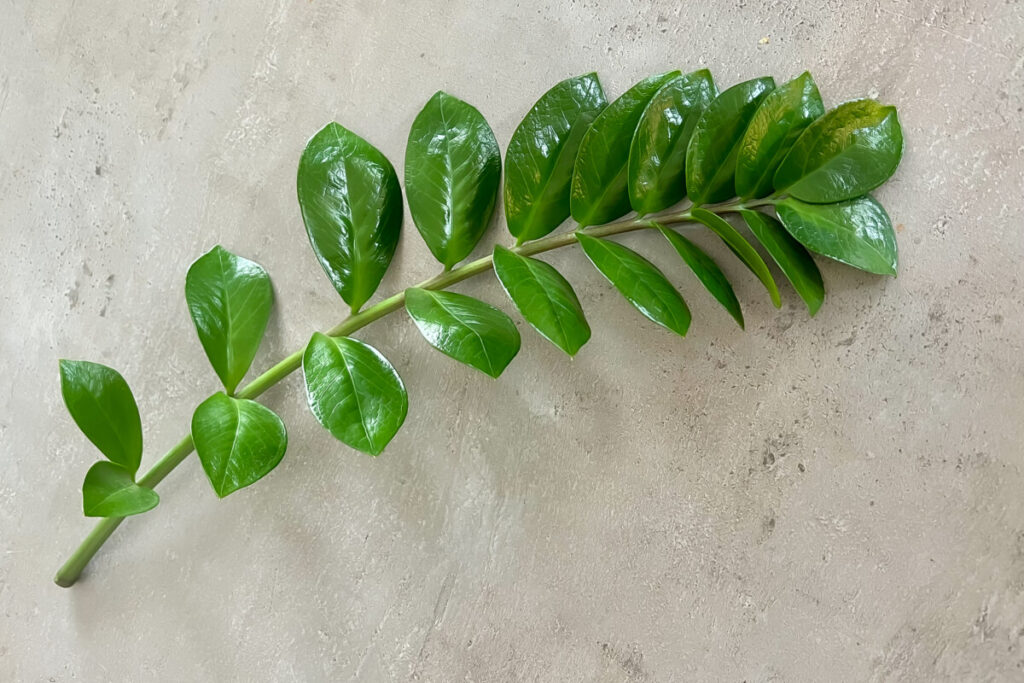
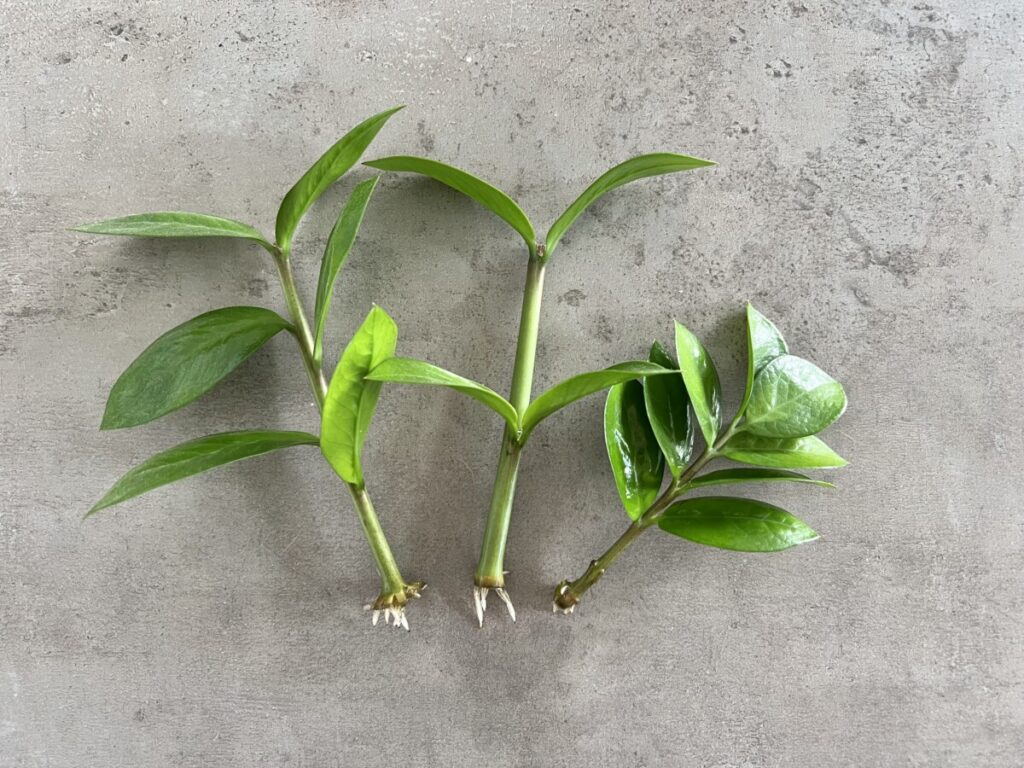
I started by choosing a healthy stem around 30cm long (12 inches) long with a number of beautiful leaves and gently cutting it from the mother plant with a clean pair of scissors. Remember to wear gloves to avoid any skin irritations. I then divided the stem into 3 sections as shown in the image below. It will be very tempting to put these beauties straight into water as soon as possible, BUT don’t be too hasty! Before attempting water propagation with these cuttings you should allow them to sit somewhere dry to allow the cut ends to callous over. This important step reduces the chance of rot. Generally I allow 24hrs or overnight.
Once the cuttings have had around 24 hours sitting out on the bench, simply place the stems in a little water. Make sure that you generously cover the end, but ensure that no leaves are submerged.
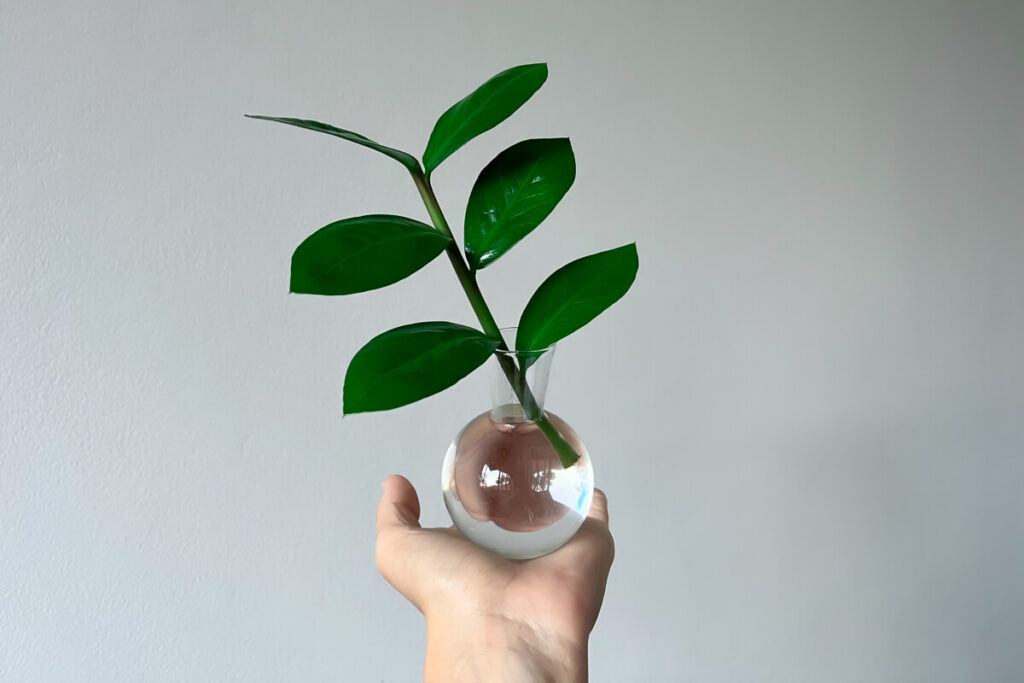
Then place the little babies in a warm, light area without direct sunlight. I use the windowsill in our kitchen.
With a change of water every few weeks and bright indirect light, you should see some root growth anywhere between two/three weeks and a few months. I know! Patience isn’t always my finest trait either! Ha!
Amazingly, you don’t require a rhizome or even a stem to propagate a ZZ plant – all you require is a leaf!
You’ll need the same tools as noted above for the stem propagation – so get all that ready before you start.
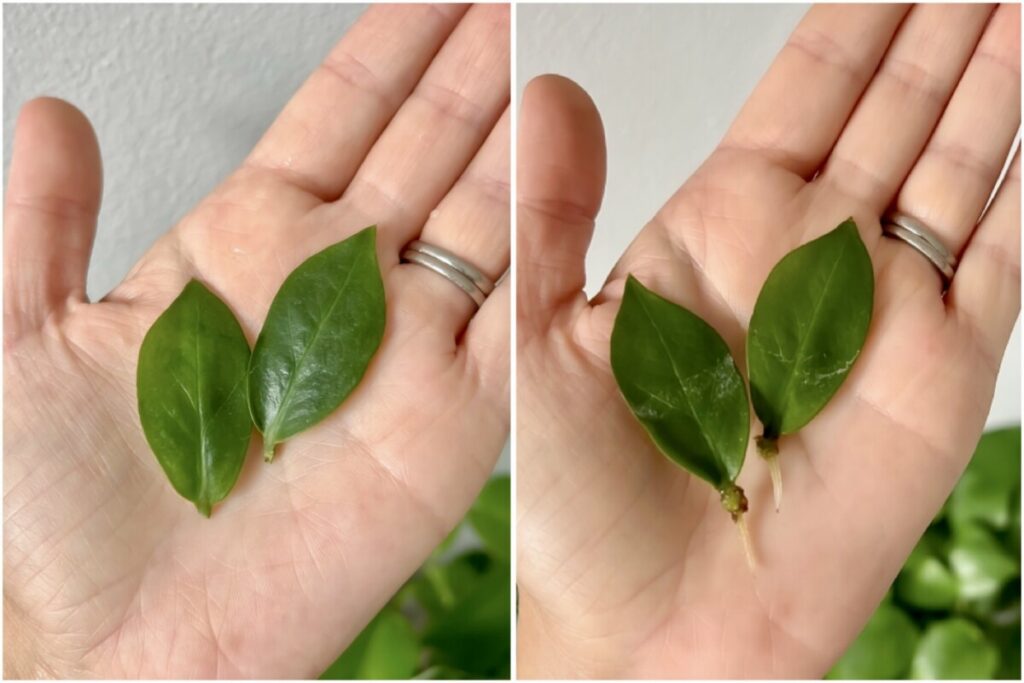
Carefully cut a few leaves from the donor plant as close to the stem as possible with the clean pair of scissors. Although it is recommended to allow the leaves to callous overnight, I have to admit that in this experiment I skipped this step! I simply placed the ends into a small glass of water or (as i love to use) a glass vase in a propagation station. Using the latter allows the roots to grow without obstruction from the bottom of the glass. The roots will begin to form within two to three weeks, but to get a mature ZZ plant from just a leaf cutting will take years.
The photo below shows the growth of the leaves after one month in water.
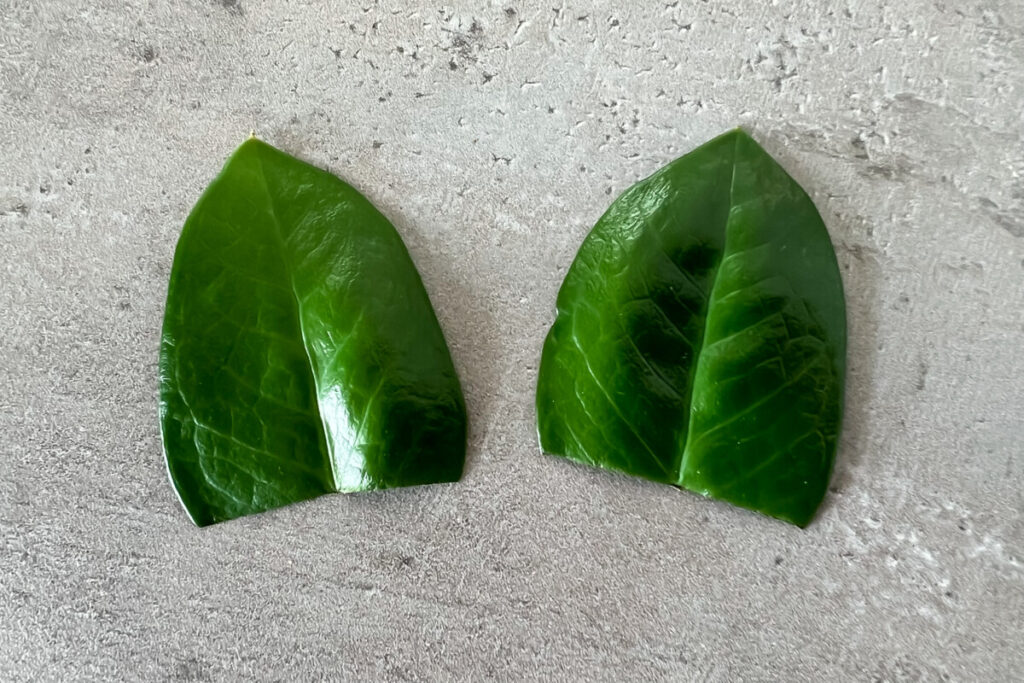
If wanting to try propagating the leaf in soil, it is best to cut off the bottom third of the leaf to promote root formation as shown in the image below. Once cut, I left to callous over before being potted upright in well draining soil. Again, I find this process difficult because I can’t witness the progress. But be patient, the roots should start to form along the cut edge of the leaf in the soil. I’m still at the beginning of this experiment, so I’ll update as this progresses.
ZZ plant leaf propagation in soil tip: create a little terrarium with a recycled plastic bottle or cup. This keeps moisture around the leaf during the root formation period!
Have you tried to propagate your ZZ Plant? Which method did you use and how successful were you? Let me know – I’d love to hear how you got on.
I don’t know many people who don’t love a beautifully ripe avocado. But what do you do with the pit after enjoying the fruit? You should definitely be propagating that amazing little avocado pit if you aren’t already! This foolproof step-by-step guide to propagating your avocado will have you growing gorgeous little avocado plants throughout your home.
If you’re intending to try to grow a plant from the pit make sure that you cut into the fruit carefully to avoid damaging it. A little cut won’t affect the germination, however any cut you make will oxidize and turn brown. (See link below to my blog about how to have some fun with this!)
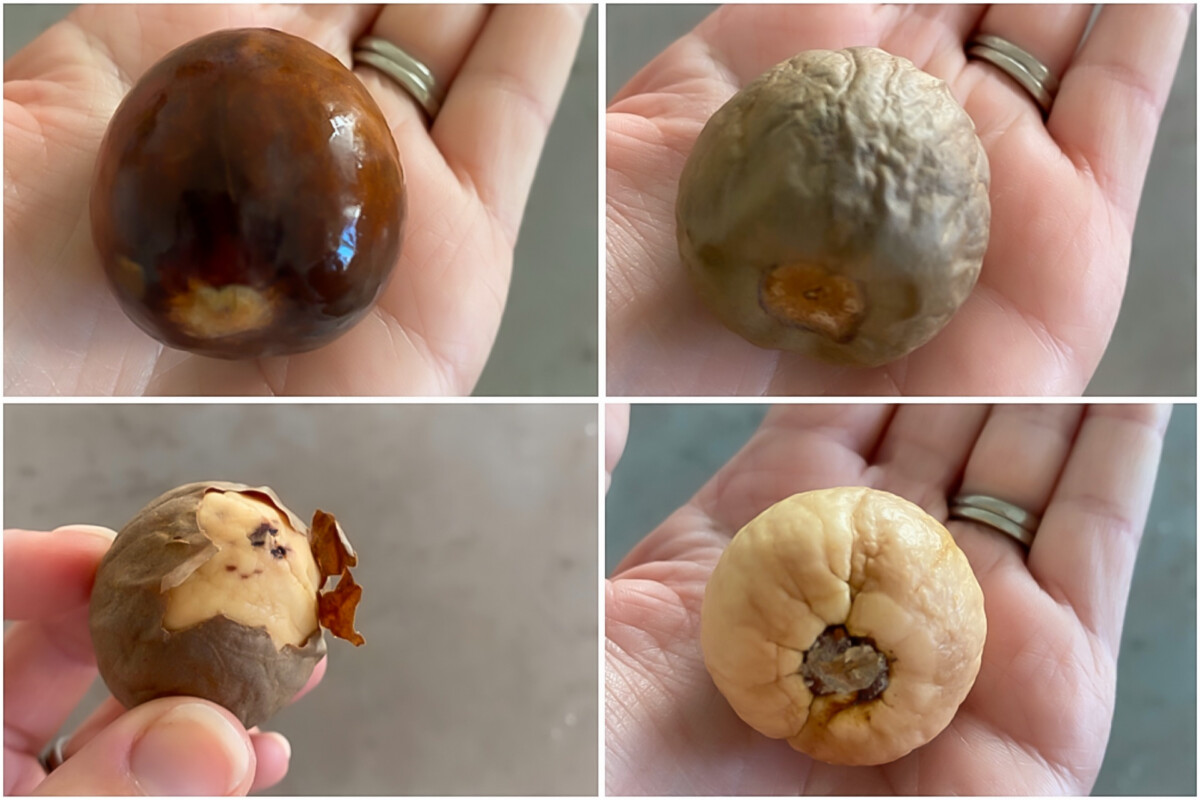
In order to accelerate germination and also to avoid any mold growth, we recommend removing the outer layer of the pit. There are a few ways to do this:
Removing the outer layer using the drying (step 2 above) method is captured below.
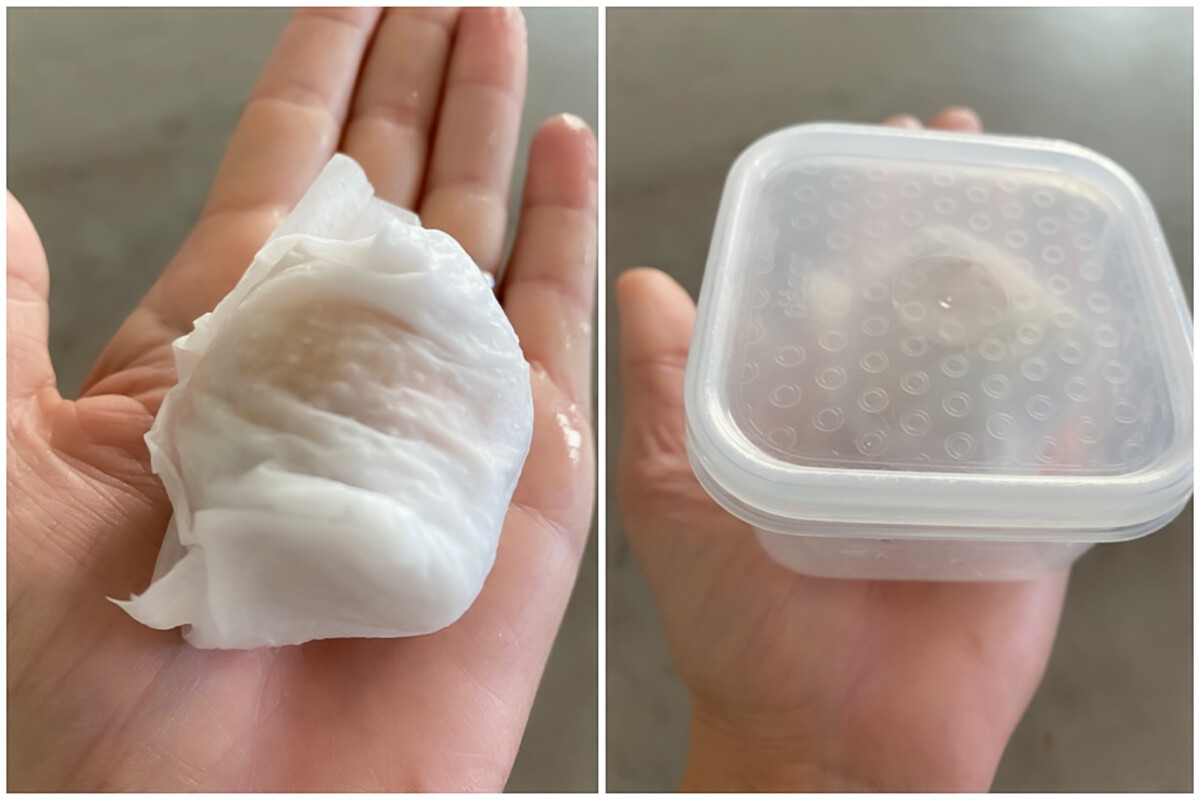
There is nothing fast about avocado germination… but the good news is that the process can be accelerated. To accelerate germination, wrap the peeled pit in damp paper towel and seal it in an airtight container. (I tend to use re-usable containers or takeaway tubs – but you can also use plastic sandwich bags). Then place the sealed container in a dark, warm spot and check on it every 4 – 5 days to monitor progress and to ensure that the paper towel remains damp. I have a little germination factory under the kitchen sink, for example!!
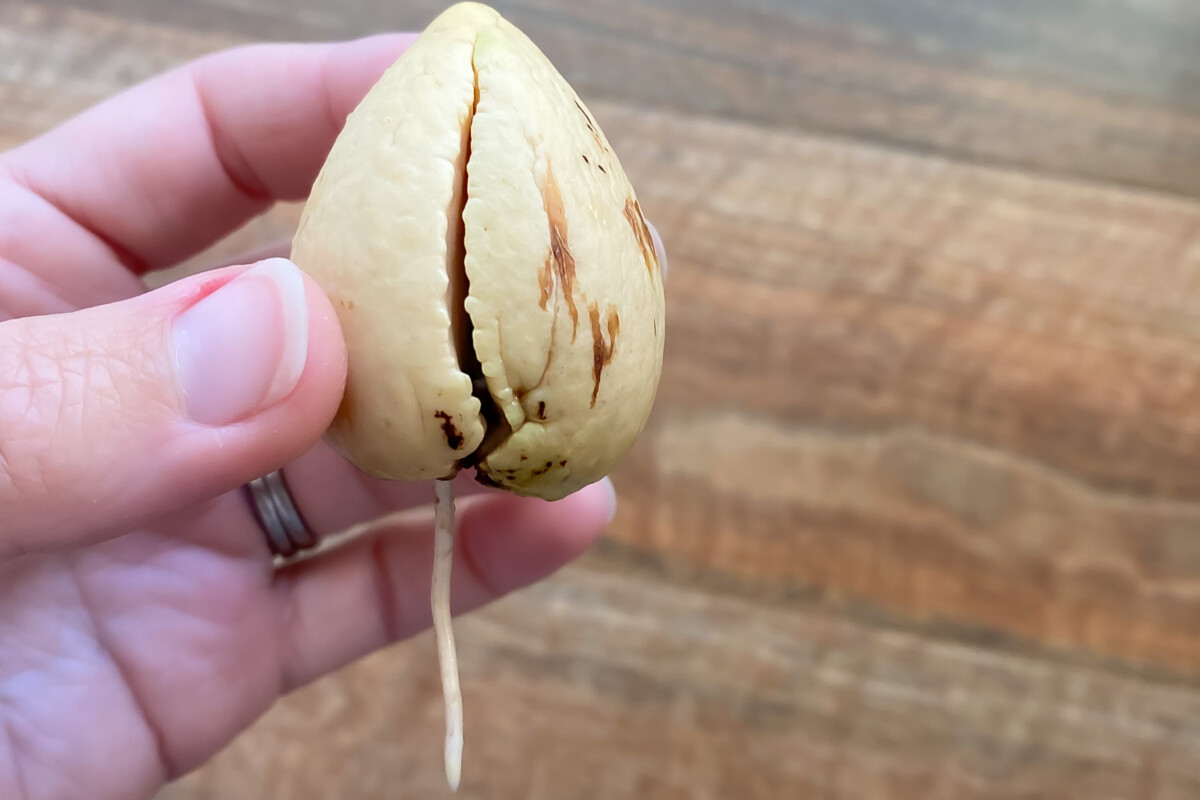
One of the first things that you notice when doing your regular checks is that the pit begins to split. This is the first sign of successful germination. You’ll then begin to notice the root growing from the bottom (flat section) of the pit. Keep the pit in its happy little humid home until the root is about 3-4 centimetres (2 inches) long.
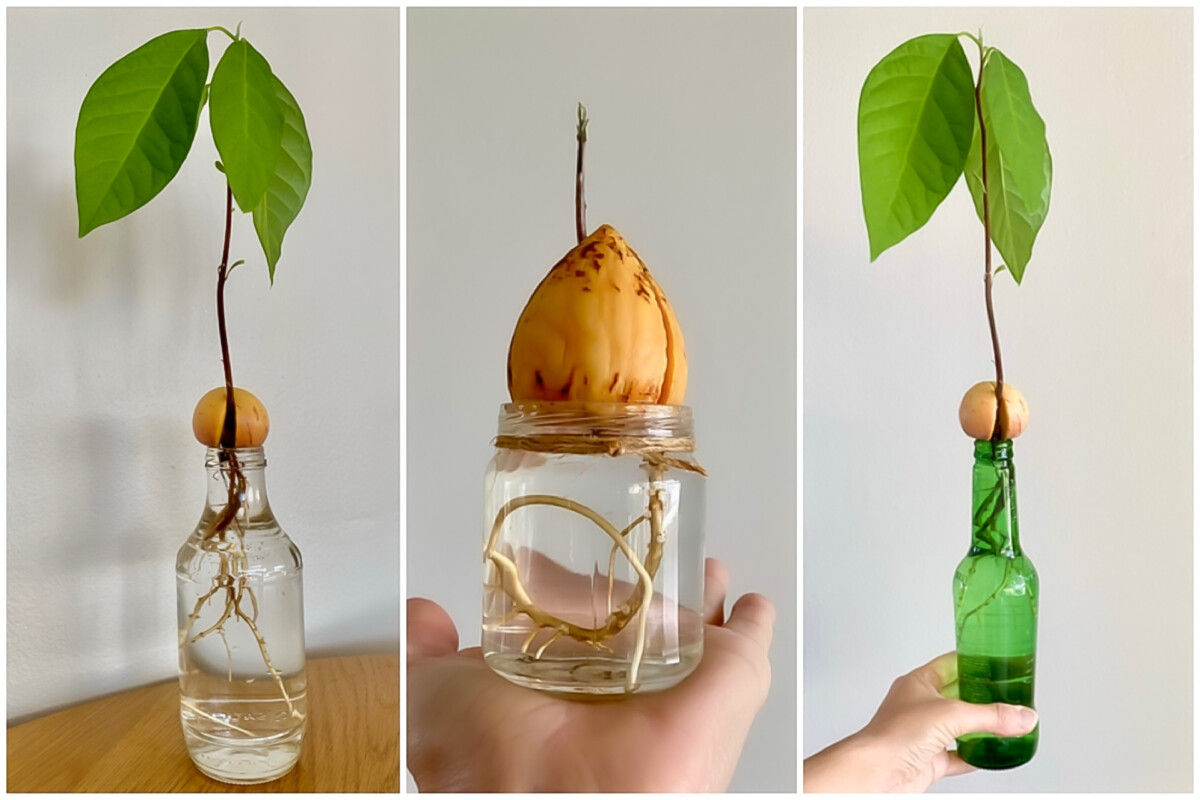
Once the root is established the pit can be transferred into water (my personal favorite as I love to watch the roots develop) or it can be planted directly into soil.
As mentioned above, I love water propagation (hydroponics) as it brings me joy to see the progress in action. You can use absolutely any vessel that holds water and keeps the pit from falling into the water, so use your imagination! Some things I have been known to use include:
If you wish to make more of a statement with your propagated avocado plant, there are beautiful options out there like avocado vases or saucers to put on top of standard glass vases.
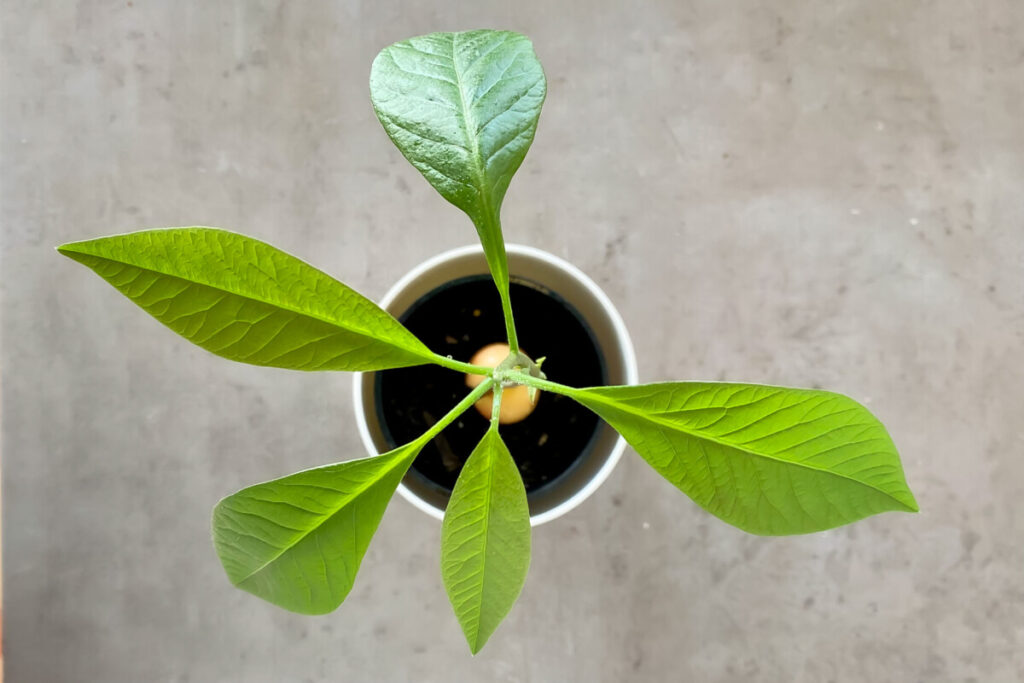
The avocado pit can be kept in water indefinitely, however we recommend changing the water every couple of weeks to keep it oxygenated. You could also add some organic liquid fertilizer to the water to promote growth – however be careful not to use too much as it could cause root burn. If kept in a bright spot, the stem and leaves will soon begin to grow.
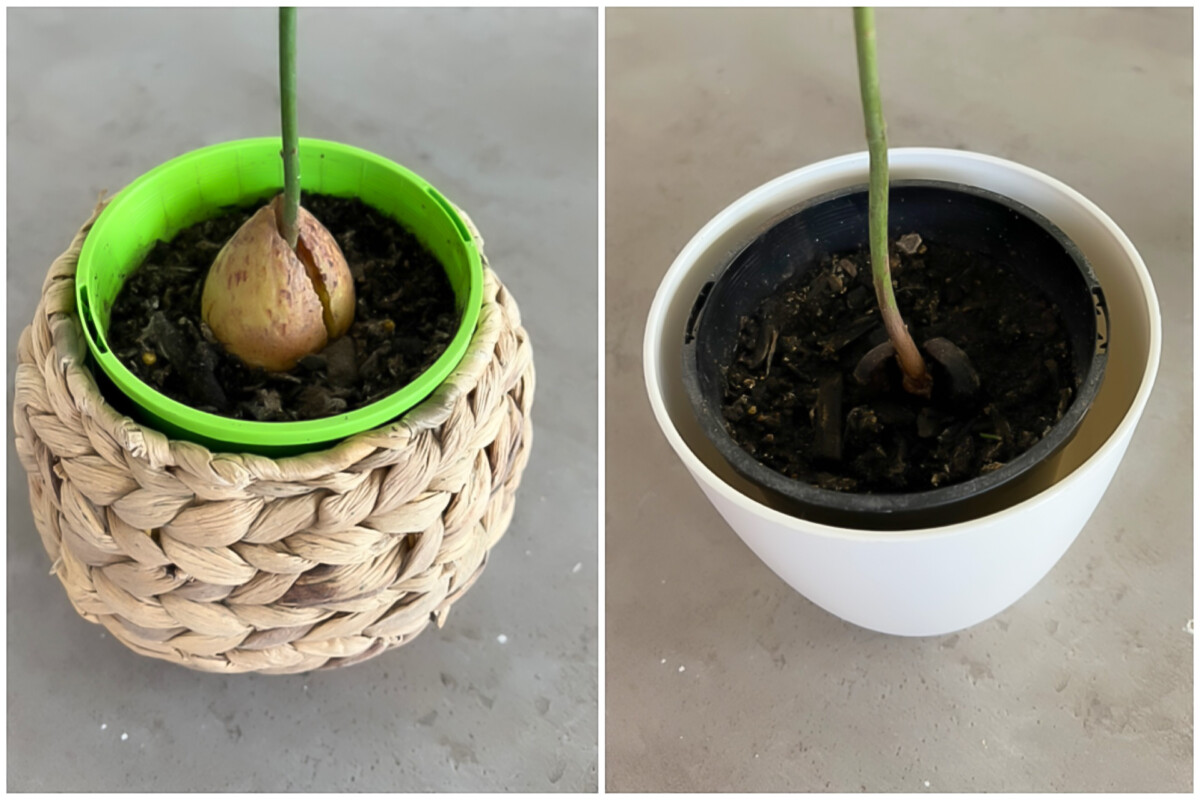
You may choose to skip the water propagation altogether and plant the rooted pit directly into soil. And this is a great option too! You don’t require much, other than standard, good quality potting soil and a pot with a drainage hole. Note that the following also applies to planting the avocado plant once the stem and leaves have grown from your water propagated plant.
Plant the pit with the flat area (where the root is growing from) facing down, and the pointed part facing up. It doesn’t matter too much how deep you plant it, or how much of the pit is showing as long as it is secure in the soil. I like leaving some of the pit visible – but that is a personal choice.
It is worth noting that once the plant has used up all the nutrients in the pit, it will naturally turn dark, shrivel up and erode into the soil. This is completely natural and means that your plant is now self-sufficient! The pit is just the initial nutrient giving vessel to help your young plant get started.
So, you’ve had a successful avocado propagation! Congratulations! Are you ready to be more adventurous?
See my blog on two fun experiments to try.
Avocado Propagation fun – Avocado Bonsai and Pit Marking.
Please, give it a go! I’d love to hear how you got on. Your success stories and your failures. I’m here to help you get a better result next time.
Get in touch!
Happy Propagating.
Recent Comments